Saturday, December 6, 2008

Buy me candy! (if you want!)

As I said on my other blog, I added a widget to the side where you can buy me a Hershey bar (on my other blog you can buy me a Java Chip from Starbucks). You can donate however much you like, but you're not required to!

If you're feeling really generous, you could donate towards my next tattoo!

On another note, I hate HTML. It's so difficult to get things just how I want it when I want to edit my pages. I wish I could just drag things where I want it instead of having to change numbers in my HTML code and saving to see if it worked or not.

That's enough for now. I'm off to get a snack while Chase finishes up his nap.

If you liked this post, click the picture to buy me a Hershey bar!

Wednesday, December 3, 2008

Zodiac Tattoo

I was looking up Zodiac tattoos since I think that's what my next one would be. I found a few interesting ones. I'm a Cancer by the way, and the symbols are a crab and another symbol that kind of looks like a sideways 69. Here's some of the ones I found.


This one is a little harder than what I was thinking of, but I do like the purple, and that the 69 symbol is encorporated in the eyes.


This one is nice, but it doesn't have the crab symbol that I want too. I think it might look pretty cool outlined in black and filled in in purple though!


Images from TattooJohnny.com


I didn't find exactly what I wanted, but I'll keep looking!

If you liked this post, click the picture to buy me a Hershey bar!

Post Thanksgiving Wrap-up

Well I tried to set up mobile blogger on here so that I could easily post and send pictures and whatnot, but that was a bust. I guess I can make posts on here from my phone, but for some reason it won't let me add pictures. Oh well, I guess I'll just have to keep on doing it the old fashioned way!

The Oreo Truffles turned out ok. I tried to melt the chocolate on a double boiler, but I guess me adding butter to try to make it smoother had the opposite effect...because then it froze up into a chocolate ball of...well...mess. Me with my bright ideas decided to try to re-heat it in the microwave, so I popped it into a glass bowl and put it on for 30 seconds. It didn't look much different but it was definitely hot. When I took it out and stirred it once, I heard a loud *POP* which was the glass bowl cracking. GREAT! So I just threw all of that away and heated up the white chocolate chips in a PLASTIC bowl in the microwave this time. That worked better but I ran out of chocolate about halfway through (not even halfway really) so I had to dash out and buy some more.

They didn't have the milk chocolate chips I wanted at the first store so I went to another and ended up getting Hershey's semi sweet chips (which I didn't want, but it was that or nothing). Then the debit card reader went down and of course all I had was $5 cash on me, but luckily it came up after a minute or two of standing in line.

All and all it turned out ok. This is why I decided to do this early. Next time I'll try 1 teaspoon of shortening in the chocolate to make it smoother and dip easier, and I'll make sure I get 2 bags of white chocolate chips and MILK chocolate chips (the semi sweet didn't taste that bad after all, but I still prefer milk chocolate). I think I'll try some mint ones too. Anyway, here was the finished product!

The drizzled chocolate on top made it look really pretty!
If you liked this post, click the picture to buy me a Hershey bar!

Monday, November 24, 2008

My semi-famous fudge

My mom taught me this recipe, that she got from a can of condensed milk once, and now every holiday I'm the designated fudge maker. It's really easy to make.

Ingredients:
1 can condensed milk
1 1/2-2 bags Milk Chocolate Chips (or semi sweet if you prefer)
1 bag of chopped walnuts (or any nuts you prefer)
1 tablespoon of vanilla (optional, sometimes I forget to add this, but you probably won't notice if you do)
Aluminum foil or wax paper

Directions:
1.In a double boiler, put the chocolate chips and let them melt. Add in the condensed milk to help with this and stir until melted and combined.

2. Add the nuts and stir completely. You can also add the vanilla now if you're using it.

3. Pour the mixture into a pan lined with aluminum foil or wax paper. Spread evenly.

4. Put in the refrigerator or freezer until hard.

5. Peel off wax paper or aluminum foil and cut into squares

6. Enjoy!

This fudge is pretty rich, so I would suggest cutting small or medium sized pieces. Leave it out for a while to allow it to soften a bit and become easier to eat. You can leave it out in an airtight container if you want, or store it in the refrigerator.

So my secret is out. I hope you enjoy it!

If you liked this post, click the picture to buy me a Hershey bar!

Oreo Balls

I'm going to try to make these for thanksgiving along with my fudge and see how well they go over. If everyone likes them, I'll make them again for Christmas! I think I might try some mint Oreo cookies too. I bet they would be really good! I'm going to dip a few in white chocolate too (to change it up a bit, and my sister likes white chocolate).

Oreo Truffle Balls

1 (1 pound, 2 ounce) package Oreo cookies
1 (8 ounce) package cream cheese, room temperature
2 (8 ounces) packages semi-sweet chocolate chips
8 ounces white chocolate, optional

* Use a good-quality chocolate. The taste and quality of these truffles are dependent on the quality of chocolate you start with.

Lin two large baking or cookie sheets with wax paper or a silpad; set aside.

In a food processor or blender, process and crush all of the Oreo cookies into fine crumbs. Add cream cheese and process until thoroughly mixed (there should be no white traces of cream cheese). Using your hands, roll into walnut-size balls, approximately 3/4-inch diameter. If the mixture becomes too soft to work, place the remaining mixture back into the refrigerator to slightly harden. Place Oreo Balls on the lined baking sheet and refrigerate or at least 45 to 60 minutes.

TIPS:

* The Oreo Balls may be stored in the freezer for up to 1 week.


* If you put the Oreo balls in the freezer for a short time before dipping in chocolate, this helps keep the balls cold longer. I also put the cookie sheets in the freezer first so they are really cold when I place the chocolate covered Oregon Truffle Balls onto the cookie sheet.

Using one of the below methods, melt the chocolate chips:

Double Boiler:

In the top of a double boiler over hot water, not boiling water (don't let the bottom of the bowl touch the water, melt chocolate; stirring until smooth. Be careful boiling water may cause steam droplets to get into chocolate which can result in "seizing," when the chocolate becomes stiff and grainy. NOTE: If you don't have a double boiler you can improvise one by placing a glass or stainless steel bowl over a pot of simmering water. Remove from heat. Let the chocolate cool slightly, but it should not set.

Microwave Melting Chocolate:

In a microwave-safe bowl, melt chocolate chips using either the defrost setting or 10-percent power in the microwave. Microwave for 1 minute, then check and stir. If you need more time, do it in 10 to 20 seconds intervals and check and stir after each addition of microwave time. Remove the container from the microwave and stir the chocolate until completely melted. Baking chips and baking chocolate may appear formed and un-melted after heating but will become fluid after stirring. Blend in cream, brandy, liqueur, or coffee

When ready to coat with chocolate, remove the chilled Oreo Balls from the refrigerator. Replace wax paper on baking sheets if they are not clean. NOTE: A small fork, toothpicks, or chopsticks are great to use as dipping tool. Dip each Oreo Ball into the melted chocolate, allowing the excess to drip back into the pot. Place the Oreo Truffle Balls onto the wax paper. NOTE: If the chocolate gets too hard to dip well, reheat it over the double boiler or in the microwave.

Optional: In a separate bowl either melt the white chocolate in a double boiler or the microwave. When melted, using a fork, drizzle white chocolate over the harden chocolate balls to decorate.

Let Oreo Truffle Balls harden and then store in an airtight container in the refrigerator.

Makes 40 to 50 candy balls, depending on the size balls your roll.

Recipe and picture from Whatscookingamerica.net

If you liked this post, click the picture to buy me a Hershey bar!

Saturday, November 22, 2008

More chocolate craziness

The more I dig the more crazy chocolate stuff I find! I'm sure your sick of posts on this subject by now (or intrigued like I am) but here are two more chocolate treats.

First up is chocolate monopoly. It's a twist on the original game, because the pieces and properties are made out of chocolate. The winner gets to eat them all. I guess this isn't a game you can play more than once!
You can buy this one from BoardGameGeek

This is not the game Monopoly except in name only.
The name is licensed from Hasbro but any similarity ends there.
The player whose turn it is spins a spinner. This determines where the player places a chocolate piece representing a property color. When all properties of that color
or railroad have been placed the next player to spin that color or railroad gets
to eat all those chocolates. There are 32 pieces of milk chocolate in the game.
The winner is the player who accumulates and eats the most pieces of chocolate
properties.


Description also from BoardGameGeek.

There's also a version called Chocolate-opoly.

You can buy this version from AreYouGame.com


Chocolate-opoly...A decadently delicious property trading game for chocolate lovers! Dark, milk, bittersweet, semi-sweet, in a shake, filled with caramel, covered in nuts, or as a warm, frothy brew - there's nothing the cocoa bean can't do. In Chocolate-opoly players buy favorite chocolate properties, collect chunks of chocolate and trade them in for chocolate factories. Sounds easy enough but pay your conching fees, suppress your cravings or get sent to Chocoholics Anonymous and it becomes a little more difficult...and a lot more fun! So choose your token and roll the dice! Who knows? You may be chosen as a "Supertaster" or you may experience Death by Chocolate. Here's a game for the true chocophile! For 2-6 players, ages 8 to adult.

Description also from AreYouGame.com

There's also a lot of recipes for chocolate covered bacon! It sounds kinda
gross...but here's the recipe if you're interested

Chocolate Covered Bacon
Original recipe by PartySugar

Ingredients
6-8 slices thick cut, best quality bacon
12 ounces semi-sweet chocolate chips
4 ounces white chocolate, melted, optional for garnish

Directions
1. Preheat the oven to 375°F.
2. Place the bacon on a baking sheet lined with parchment paper. Bake in the oven, until bacon is cooked to your liking. 15 minutes for soft bacon, 20 minutes for crispy bacon.
3. Let bacon cool on the parchment paper for 5 minutes then transfer to a plate lined with paper towels.
4. Meanwhile set up a double boiler. Heat a large saucepan filled with water over high heat until boiling. Reduce heat to a simmer.
5. Set a heat-proof bowl over the simmering water. Add the chocolate chips and stir with a fork until smooth and completely melted.
6. Cover another baking sheet with parchment paper.
7. Using tongs, carefully dip the bacon into the melted chocolate turning to coat all sides in chocolate. Transfer to the clean sheet of waiting parchment paper. Repeat with remaining slices of bacon.
8. Drizzle with the white chocolate, if desired.
9. Refrigerate until chocolate is hard.
10. Once cool, enjoy!

Recipe from yumsugar.com

If you liked this post, click the picture to buy me a Hershey bar!

More weird chocolate

I found a few more weird items.

At Toe-Food Chocolates and Candy they have a 10 oz. chocolate foot! Great for the chocoholic on your christmas list that also has a foot fetish!


At Chocolate Cheers you can customize a 10 lbs bar of chocolate into an american express card for only $75!

I sure hope that's not her real card number! lol

At The Candy Shop you can buy chocolate covered gummy bears!

These are just cavities waiting to happen.
I love chocolate, but I might have to pass on a few of these. I don't really think chocolate and gummy bears would go well together. I know if I tried to eat 10lbs of chocolate that I would fall into some sort of coma (but I WOULD try it!) And the chocolate foot reminds me of a squeeky toy that I had for my dog Panther that was a foot. He ended up chewing all of the toes off of it. Maybe not the best toy idea for him lol. Actually though, once you at the toes off of the chocolate foot, then it's just a big hunk of chocolate!
If you liked this post, click the picture to buy me a Hershey bar!

Weird chocolate creations

While I was surfing the web, I ran across some rather strange chocolate concoctions.
On http://www.bluelips.com/ I found things such as:
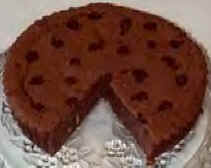
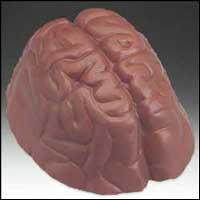
chocolate brains (some with cherry filling!)

A chocolate casket


A chocolate tooth (also in white chocolate)


And last but certainly not least:


An anatomically correct chocolate heart
(this would be a great X-mas gift for anatomy students)

There are a few more items on the site if you want to take a look yourself. They're kind of creepy...but who am I kidding, I'd still eat them! The chocolate tooth is actually pretty cute too. Good for anyone with a sweet tooth!
If you liked this post, click the picture to buy me a Hershey bar!

Too dark to tattoo?

I remember when I got my first tattoos. I went to the shop a few times to talk to the artists before I got it. I wanted the Eye of Horus and an Ankh because I love anything egyptian, and well...they stood for wisdom and eternal life. How cool is that? I had this great idea of having my tattoos outlined in black, but filled in or shaded in purple. The guy working there told me because of my skin tone (aka because I'm black) that color wouldn't show up well on me and would eventually turn a icky muddy brown or grey color after it healed. I decided to get mine done in all black, and as it turns out, I loved them! I loved my tattoo artist's idea of shading them instead of filling them in all the way too. I had no clue what that meant, but he said he'd shade them for me and if I didn't like it then he would fill them in completely. I loved what he did so I didn't get them filled in all of the way. I guess that's a common problem with some black people though. I know some people worry about if lighter colors would even show up on their skin. I'm not even that dark either. As you can see on my other blog, I'm somewhere between caramel and milk chocolate lol.

I ran across this posting of another black girl asking about tattooing. Apparently doing color isn't as hard as it seems.

Expert: The GYPSY - Professional Tattoo Artist and Body PiercerDate: 3/24/2004

Subject: Milk chocolate colored skin Question. Thanks, in advance, for your
time.

FACTS:I am a black girl with skin that is aproximately the color of a kit kat bar. I don't like sunlight, so I'm always about this shade. I want a colorful backpiece that represents my love of the differences between the seasons.

QUESTIONS:What kinds of colors will show up best? How will healing affect the final results? How do I find an artist that specializes in my skin type? Do you know of any?Again, your time is valued, and greatly appreciated.

Cayenne Moody :o)

Answer
Cayenne,


Chocolate Brown skin is not as diffulcult as some people think to tattoo. There are just a few thinks to remember.... Dark skin has a tendency to Keloid so the artist you choose must be familur with this problem so that they know and understand the correct needle depths. When deciding on your colors stay with Darker colors such as Blues, Reds, Greens and Purples. Your darker skin tone will show through the lighter colors such as Orange, Yellow and White. Deepending on how dark your skin is sometimes using a deep uncut purple is better for your outline than using black. The darker the skin the greener black looks in the skin. Deep uncut purple seems to appear black in real dark skin. Make sure your artist uses a wider line as thin lines are hard to see in dark skinned people. The artist that you need to look for is any qualified, licensed, professional artist with years of experience. If you would like an idea of what to look for in an artist or studio you can visit my FAQ page at http://www.ubtat2d.com/faq.htmlI hope this has been of some help to you. If I can be of any further assistance please let me know.

-The
GYPSY-www.ubtat2d.com

Post taken from: http://en.allexperts.com/q/Tattoos-3028/Milk-chocolate-colored-skin.htm


I guess it all just depends on the tattoo artist.
If you liked this post, click the picture to buy me a Hershey bar!

Thursday, November 20, 2008

Different Molten Cakes

I saw this on the menu the last time I was at Chilis. I didn't get it, because I LOVE the original Chocolate Molten cake, but it looked interesting. Plus I'm not a really big fan of white chocolate (as I've said before).

(Sorry, couldn't find a pic, but it looks like the white chocolate one with chocolate chips in it)
Warm chocolate chip cookie cake with milk chocolate fudge filling. Topped with vanilla ice cream under a crunchy chocolate shell.

They also have a White Chocolate Molten cake:


Warm white chocolate cake with a white chocolate filling, raspberry sauce and white chocolate curls. Topped with vanilla ice cream under a crunchy white chocolate shell.

All of this is making me hungry! I think I might finish off that last slice of Hershey cream pie!
If you liked this post, click the picture to buy me a Hershey bar!

Cake with no eggs

I saw another recipe on In Iowa Today but this one I actually wanted to try! It's a cake made with no eggs! How many times have you been ready to make some cake (probably store bought) only to realize you don't have any eggs? It's so hard to remember to get those little things, and then when you do remember, sometimes they sit in the bottom of the fridge, or the door forever.

I swear, when you have plenty of eggs, you forget about them or don't use them, and when you need some there aren't any to be found! Once again she took a picture of the ones she made. I think I have everything I need to make this one...except cocoa powder....*grumbles*

Wacky Cake
1 1/2 cups unbleached all-purpose flour
1 cup sugar
3 tablespoons cocoa
1 teaspoon baking soda
1/2 teaspoon salt1 teaspoon vanilla
1 teaspoon vinegar
5 tablespoons vegetable oil
1 cup water, cold
Mix flour, sugar, cocoa, soda and salt.Make three wells in the flour mixture.In one put vanilla; in another the vinegar, and in the third the oil.Pour 1 c cold water over all and stir.No need to beat.Pour into 8 x 8-inch pan.Bake at 350 degrees F oven until it springs back, about 30 minutes

Peanut Butter Frosting
1/2 cup peanut butter, smooth
5 tablespoons margarine, softened
1 cup powdered sugar (or more, to taste)
1-3 tablespoon milk (optional)
Beat butters together with electric mixer, add sugar. If too thick, add a little milk

If you liked this post, click the picture to buy me a Hershey bar!

Cake in a cup

I saw this recipe on a fellow WPLHers blog. I've never heard of it and it sounds like it would be dreadful, but it's a cake in a mug that you mix together and then put in the microwave. Eww. I've been desperate for chocolate, but not THIS desperate.

4 T flour
4 T sugar
2 T cocoa
Mix together dry ingredients
1 egg
splash of vanilla
3 T oil
3 T milk
3 T chocolate chips (optional)

Mix wet ingredients into dry and mix well right in the mug. Microwave for 3 1/2 minutes. Allow to cool for a bit and sprinkle with powdered sugar or frost.

She even took a picture of the one she made on her blog In Iowa Today. It looks good...but I gotta think that it wouldn't taste that good.

If you liked this post, click the picture to buy me a Hershey bar!

Tattoos


I know I've been all over the place with this blog, but I'm going to try to find some good tattoo info today. I've been wanting to get another tattoo. Speaking of, here are my two tattoos!


They're a little bigger than this of course, and I won't tell you where they are! I love them though, and I've always wanted a few more. If I had my way, I would be tattooed all over like Kat Von D. Well, maybe not the face or hands so much.

If you liked this post, click the picture to buy me a Hershey bar!

Tuesday, June 24, 2008

Happy Birthday!

I'm officially 23 today! Yay for me! It really doesn't feel any different from 22. Maybe 24 will be different. Oh man, I'm getting old! I probably won't be doing much today. I have to get ready for work in a little bit. Oh joy! I'm working at Coca Cola again. I don't know how long this will last. Anyways, since it's my birthday, what better than a extra chocolate cake? This one is called a "Death by Chocolate" cake. The thought makes my mouth water! I think I would use chocolate ice cream instead though!

1/4 c. cocoa
1 1/4 c. powdered sugar
5 eggs1 tsp. vanilla
1/4 tsp. salt
1 quart good vanilla ice cream

Preheat oven to 350 degrees. Sift cocoa and sugar together. Separate the eggs; put the yolks and vanilla in a large bowl and beat very well until thick.
In another bowl beat the egg whites until foamy; add salt and continue beating until soft peaks are formed. Fold the cocoa and sugar into the whites, then gently fold the egg white mixture into the beaten yolks. Thoroughly butter a 10"x15" cookie sheet and line it with wax paper. Spread the batter evenly in the pan; bake 18 to 20 minutes, until toothpick comes out clean. Sprinkle a clean tea towel with powdered sugar and turn cake out onto it. Remove wax paper and trim off crispy edges, if any. Roll the cake in the towel from the long end and let it rest 1 to 2 minutes. Unroll and let it rest again for a few minutes, then roll it up again and allow it to cool completely.
Set ice cream out to soften. Unroll the cooled cake; spread evenly with ice cream and roll it back up (without the tea towel). Dust the top with powdered sugar. Keep it in the freezer until ready to serve. When ready, cut the cake and serve it with Killer Chocolate Sauce.

KILLER CHOCOLATE SAUCE:
3 tbsp. unsalted butter
4 oz. unsweetened chocolate
2/3 c. boiling water
1 1/2 c. sugar
7 tbsp. corn syrup
1 tsp. vanilla

Melt the butter and chocolate in a heavy saucepan over low heat; add boiling water and stir well. Mix in the sugar and corn syrup, until sauce is smooth. Boil the sauce, without stirring for 10 minutes; remove from heat; cool 20 minutes, then add the vanilla. Spoon the sauce over the Death by Chocolate Cake.

Recipe from http://www.cooks.com

If you liked this post, click the picture to buy me a Hershey bar!

Wednesday, January 2, 2008

White Chocolate Macadamia Nut Cookies

I don't think these would be as good as the ones that pepridge farm makes, but they might be good. I'm not a big fan of white chocolate though, so I would use milk chocolate instead.

Makes about 3 dozen
1 Cup Plus 2 Tbs. flour
1/2 tsp. Baking soda
1/4 tsp. Salt
1/2 Cup Unsalted butter, softened
1/2 Cup Light brown sugar, packed
1/4 Cup Granulated sugar
1 egg
1 tsp. Vanilla
9 oz White chocolate chips
1 Cup Macadamia nuts, coarsely chopped

Preheat oven to 375F. In a large bowl, mix together flour, baking soda and salt. In large bowl, using a hand-held mixer set at medium speed, cream butter with the sugars for 2 to 3 minutes, until light and fluffy. Beat in the egg and vanilla. Reduce speed and beat in the flour mixture until just combined. Stir in the white chocolate and macadamia nuts. Using a rounded tablespoon of dough, drop cookies onto a cookie sheet (either air-bake or with parchment paper.) leave about 1 inch between the cookies. Bake 9-12 minutes, until lightly golden. Transfer the cookies to a wire rack and cool completely

Recipe from http://www.pastrywiz.com/

If you liked this post, click the picture to buy me a Hershey bar!

Tuesday, January 1, 2008

Happy New Year!

I know it's been a while since I posted...but I'm back with a yummy chocolate recipe!

Chocolate Chip Brownie Cake

Ingredients:
1/2 cup butter
3 1/2 cups semi-sweet chocolate chips
1 1/2 cups flour
1 tsp. baking soda
1 1/2 cups sugar
1 Tbs. vanilla
1/4 cup hot water
4 eggs

Directions: Melt butter and 2 cups chocolate chips together. In a small bowl mix flour and baking soda together.Put melted chocolate mixture in a large bowl. Add sugar and beat for about 5 minutes until smooth. With mixer on add vanilla, and gradually add water. Add eggs one at a time and beat after each addition.With mixer on low add flour mixture until blended. Fold in remaining 1 1/2 cups semi-sweet chocolate chips.Pour into a greased 10 inch round pan. Bake at 325 degrees F. for 35 to 45 minutes. Cool. Store in refrigerator

Recipe from http://www.pastrywiz.com/

I haven't tried this one yet but I might

If you liked this post, click the picture to buy me a Hershey bar!

hit count
Charter Cable Internet